Deploying a Data Provider to EC2
This guide will show you how to create and deploy a production-grade data provider to a fresh Amazon EC2 instance. By the end of the guide you will have a publicly visible server able to publish shared data, secured by the FAPI specification as required by Open Energy.
Throughout this guide the domain example.energydata.org.uk is used - obviously you should change this to your own
domain when you see it, bear in mind that it appears in filenames as well as in the contents of some of the
configuration files themselves!
Note
Before proceeding, ensure you have the following:
An EC2 instance configured with Amazon Linux and a static IP address
The ability to log into this instance with SSH as a user able to run
sudoAppropriately configured access to ports 80 and 443 on this server
An account on the Open Energy Directory associated with an organisation
A domain name which you control with sufficient access to add
ArecordsApproximately four hours of time and some coffee or other beverage of your choice
Installing Python 3.9
Copied from a tutorial here, the following commands will
install any missing prerequisites then install Python 3.9 to replace the default 3.7 included in Amazon Linux. This
takes a few minutes, and ends up with an executable for python3.9 added to the path, but does not replace the
default Python 2 or 3.
> sudo yum install gcc openssl-devel bzip2-devel libffi-devel
> cd /opt
> sudo wget https://www.python.org/ftp/python/3.9.4/Python-3.9.4.tgz
> sudo tar xzf Python-3.9.4.tgz
> cd Python-3.9.4
> sudo ./configure --enable-optimizations
> sudo make altinstall
All Python code, including the gunicorn WSGI container, will run from a virtual environment created in the
ec2-user home directory. Create the environment, activate it, install the necessary libraries, and fetch missing
root certificates used by the directory - these are necessary for nginx to correctly validate the presented client
certificates:
> cd ~
> python3.9 -m venv venv --upgrade-deps
> source ./venv/bin/activate
> pip install ib1.openenergy.support
> oe_install_cacerts
Installing Nginx
Nginx can be installed as an Amazon extra:
> sudo amazon-linux-extras install nginx1
Installing and configuring Certbot
Run the following commands to set up the necessary prerequisites and install the certbot configurations to work with Nginx:
> sudo wget -r --no-parent -A 'epel-release-*.rpm' https://dl.fedoraproject.org/pub/epel/7/x86_64/Packages/e/
> sudo rpm -Uvh dl.fedoraproject.org/pub/epel/7/x86_64/Packages/e/epel-release-*.rpm
> sudo yum-config-manager --enable epel*
> sudo yum install -y certbot python2-certbot-nginx
Note
To proceed beyond this point you must have pointed your desired domain name at the static IP address of your EC2
instance, and any DNS changes must have propagated through the system. You can verify this with tools like
nslookup or ping.
Initial Nginx configuration
Create a new file, /etc/nginx/conf.d/example.energydata.org.uk.conf, with the following contents:
server {
    listen 80 default_server;
    listen [::]:80 default_server;
    root /var/www/html;
    server_name example.energydata.org.uk;
}
Restart Nginx to pick up the configuration you just added:
> sudo systemctl restart nginx
Certbot
Activate the Certbot to get your free Let’s Encrypt certificate:
> sudo certbot --nginx -d example.energydata.org.uk
This will ask you for an email address to which urgent notifications will be sent pertaining to certificate expiry etc, and request that you confirm acceptance of the terms and conditions, as well as checking for opt-in to mailing lists and similar which you can ignore or not as you prefer.
You should see a message indicating success. This process will also have modified the Nginx config you created earlier
to add the necessary configuration to use this new certificate, you can confirm this with
less /etc/nginx/conf.d/example.energydata.org.uk.conf or by loading it into an editor to inspect the changes.
Note
You may wish to add a cron rule at this point to check for certificate expiry and automatically renew the certificate - these are relatively short-lived and a certificate expiring will bring your service down. See the Automated Renewals section of the Certbot docs for more details.
Final Nginx configuration
The modified configuration created by the Certbot is sufficient to expose an SSL enabled HTTP server, but we have to add some extra information before it will correctly pass through client certificates to our data provider. Edit the file and change it to the following:
server {
    listen 80 default_server;
    listen [::]:80 default_server;
    root /var/www/html;
    server_name example.energydata.co.uk;
}
server {
    server_name example.energydata.org.uk;

    listen [::]:443 ssl ipv6only=on;
    listen 443 ssl;
    ssl_certificate /etc/letsencrypt/live/example.energydata.org.uk/fullchain.pem;
    ssl_certificate_key /etc/letsencrypt/live/example.energydata.org.uk/privkey.pem;
    include /etc/letsencrypt/options-ssl-nginx.conf;
    ssl_dhparam /etc/letsencrypt/ssl-dhparams.pem;

    root /home/ec2-user/public;

    ssl_client_certificate /home/ec2-user/venv/lib/python3.9/site-packages/certifi/cacert.pem;
    ssl_verify_client on;

    location / {
      try_files $uri @proxy_to_app;
    }

    location @proxy_to_app {
      proxy_set_header X-Forwarded-For $proxy_add_x_forwarded_for;
      proxy_set_header X-Forwarded-Proto $scheme;
      proxy_set_header Host $http_host;
      proxy_redirect off;
      proxy_pass http://unix:/run/gunicorn.sock;
      proxy_set_header X-OE-CLIENT-CERT $ssl_client_cert;
    }

    error_page 500 502 503 504 /500.html;
    location = /500.html {
      root /home/ec2-user/public;
    }
}
server {
    if ($host = example.energydata.org.uk) {
        return 301 https://$host$request_uri;
    }
    listen 80 ;
    listen [::]:80 ;
    server_name example.energydata.org.uk;
    return 404; # managed by Certbot
}
Note
The lines highlighted in yellow above are from the Certbot process, yours will, and should, be different! In general
you will need to change any reference to example.energydata.org.uk to your own domain.
This configuration does a few things.
It configures an SSL server listening on port 443 (the default for HTTPS)
It sets up client certificate validation and makes this mandatory - all connections on port 443 must present a client certificate. This is exactly what you want for a server, the sole role of which is to serve a shared data API, but you may want to configure this differently if you also want to serve content to web browsers rather than API clients. See the Nginx docs for more information
In order to provide your application with access to the client certificates presented by data consumer clients, it pushes any such client certificate into a header
X-OE-CLIENT-CERTIt attempts to serve static content from
/home/ec2-user/public, and falls back to your data provider application if the specified content does not exist, accessing the application through a UNIX socket
Restart Nginx to pick up these extra changes:
> sudo systemctl restart nginx
Generating key material using the directory
The certificate created by Certbot is used by the server part of the data provider. There is a second set of key material required, however, for the data provider to connect to the Open Energy authorisation server when validating tokens. To create these keys you will need to log into the directory here.
Note
This requires you to have administrator access to an organisation within the directory. If you are part of our beta programme you should have this, if not please contact us and let us know your details and the details of the organisation on who’s behalf you should be able to act.
Select your organisation
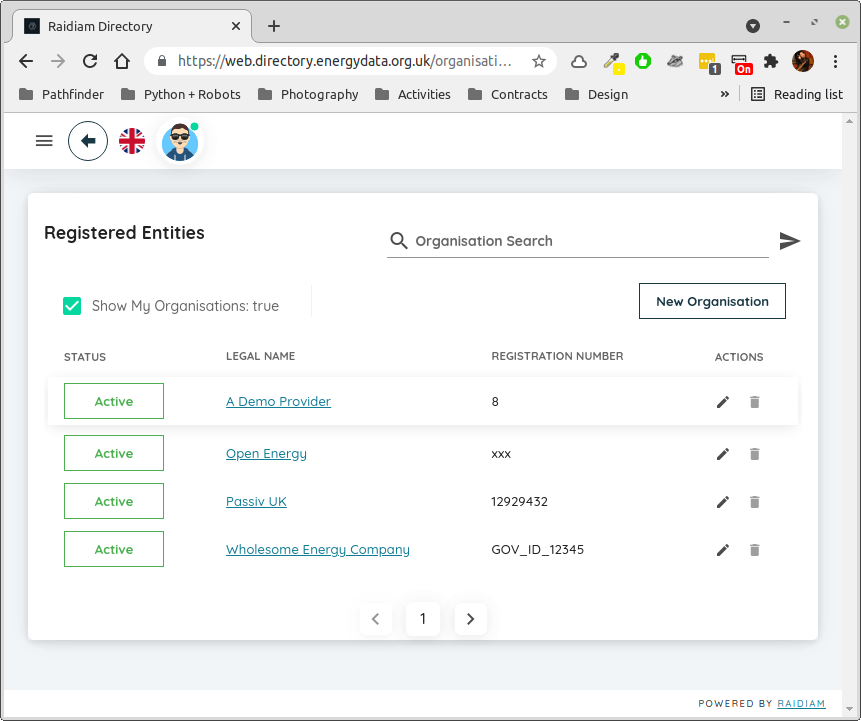
Fig. 1 Select your organisation, typically if you check the box at the top of the page you will only see the single one to which you have access.
Create a software statement
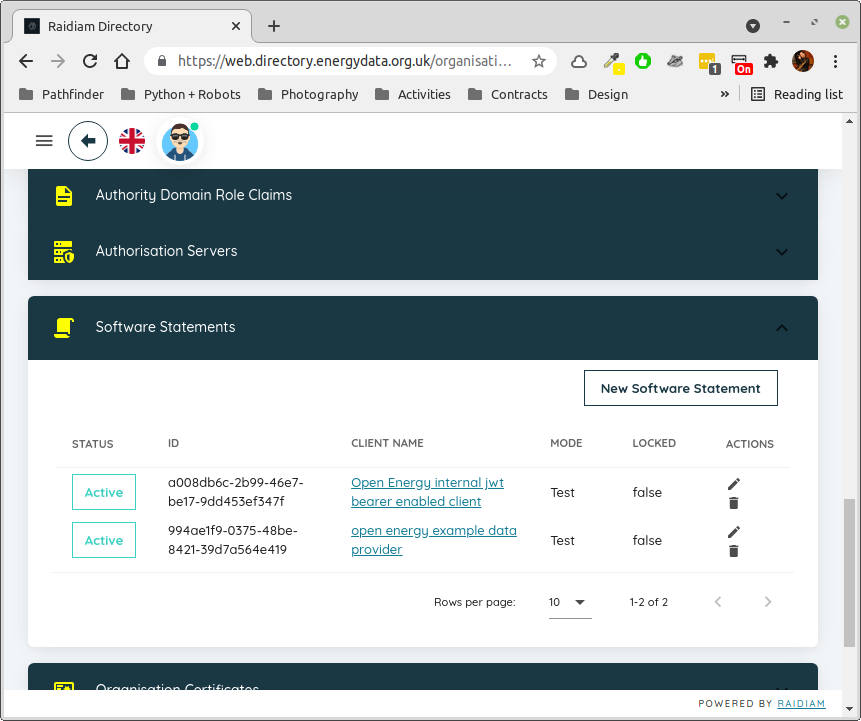
Fig. 2 With the organisation selected, scroll down to the Software Statements section. Click on it to open the section,
in this case there are two existing ones but you wouldn’t expect to have any if this is the first time you’ve done
this. Click on the New Software Statement box to create one.
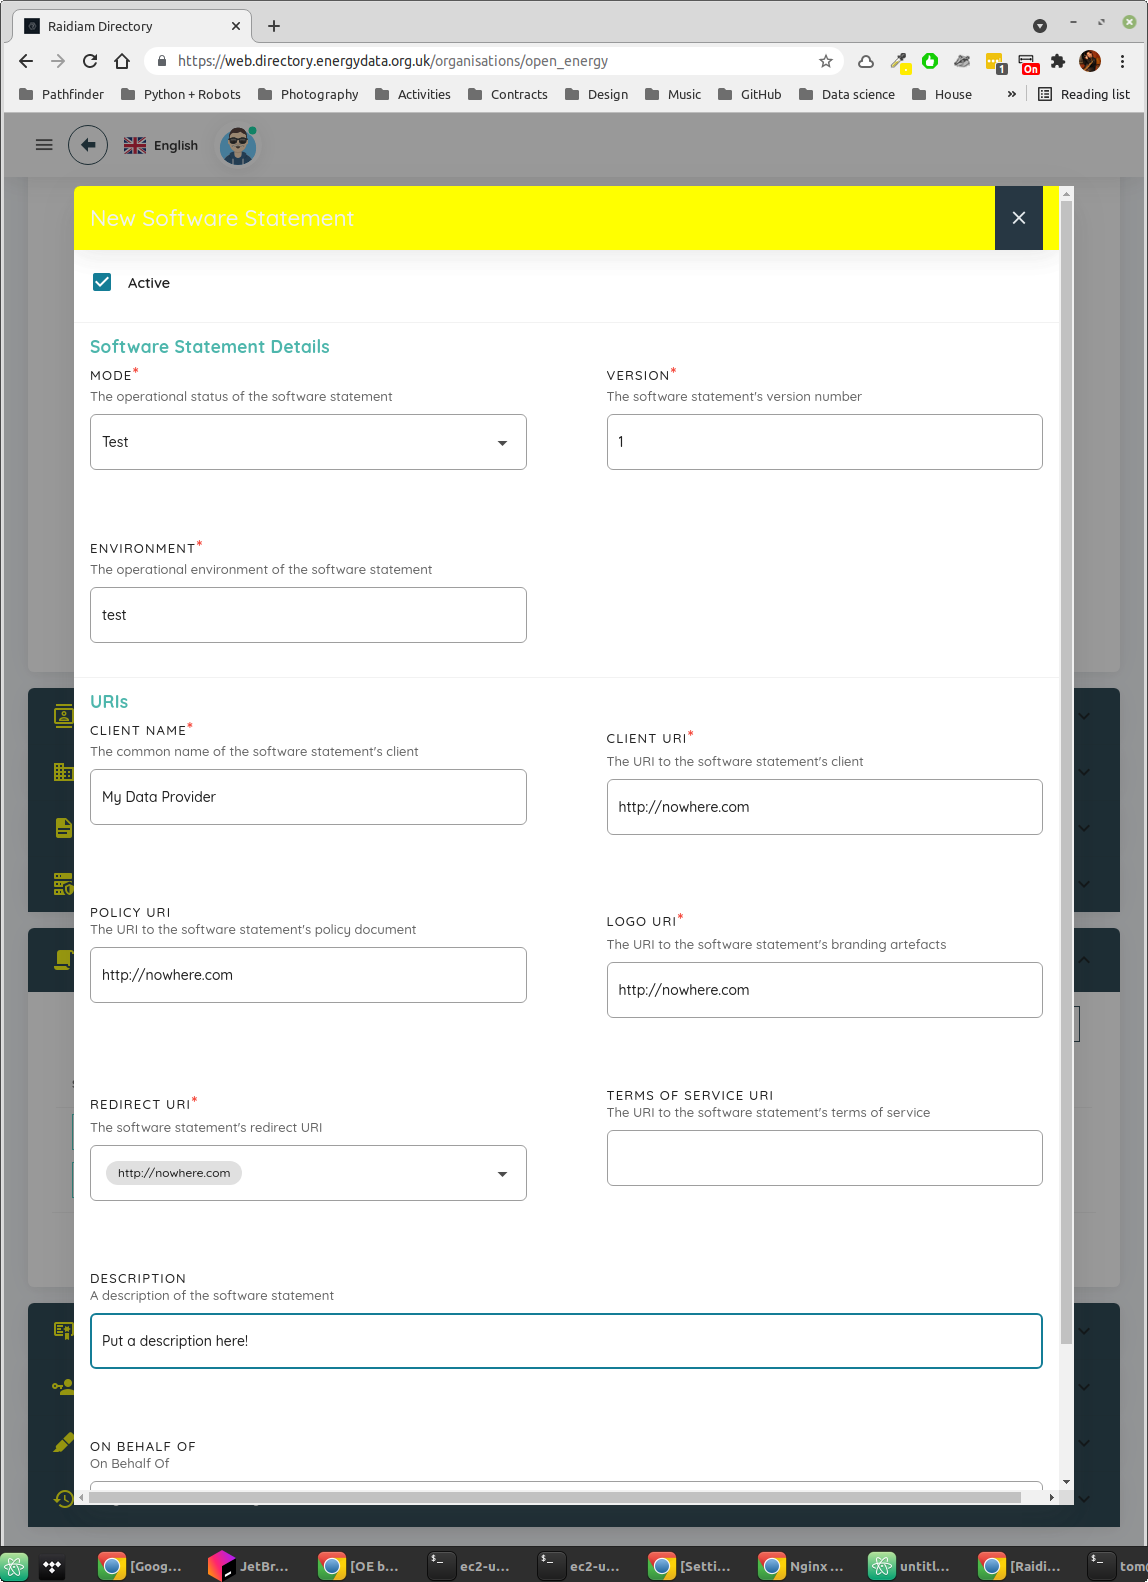
Fig. 3 Populate the fields here to create a software statement.
Set MODE to
TestSet VERSION to
1Set ENVIRONMENT to
testSet a suitably descriptive value for CLIENT NAME and DESCRIPTION
It doesn’t matter what URI / URL you put in the other fields, but you have to put something in. The example here is as good a choice as any - because of how we use the directory these have no actual effect on anything.
Scroll down and click on the button to save your software statement.
Create a certificate
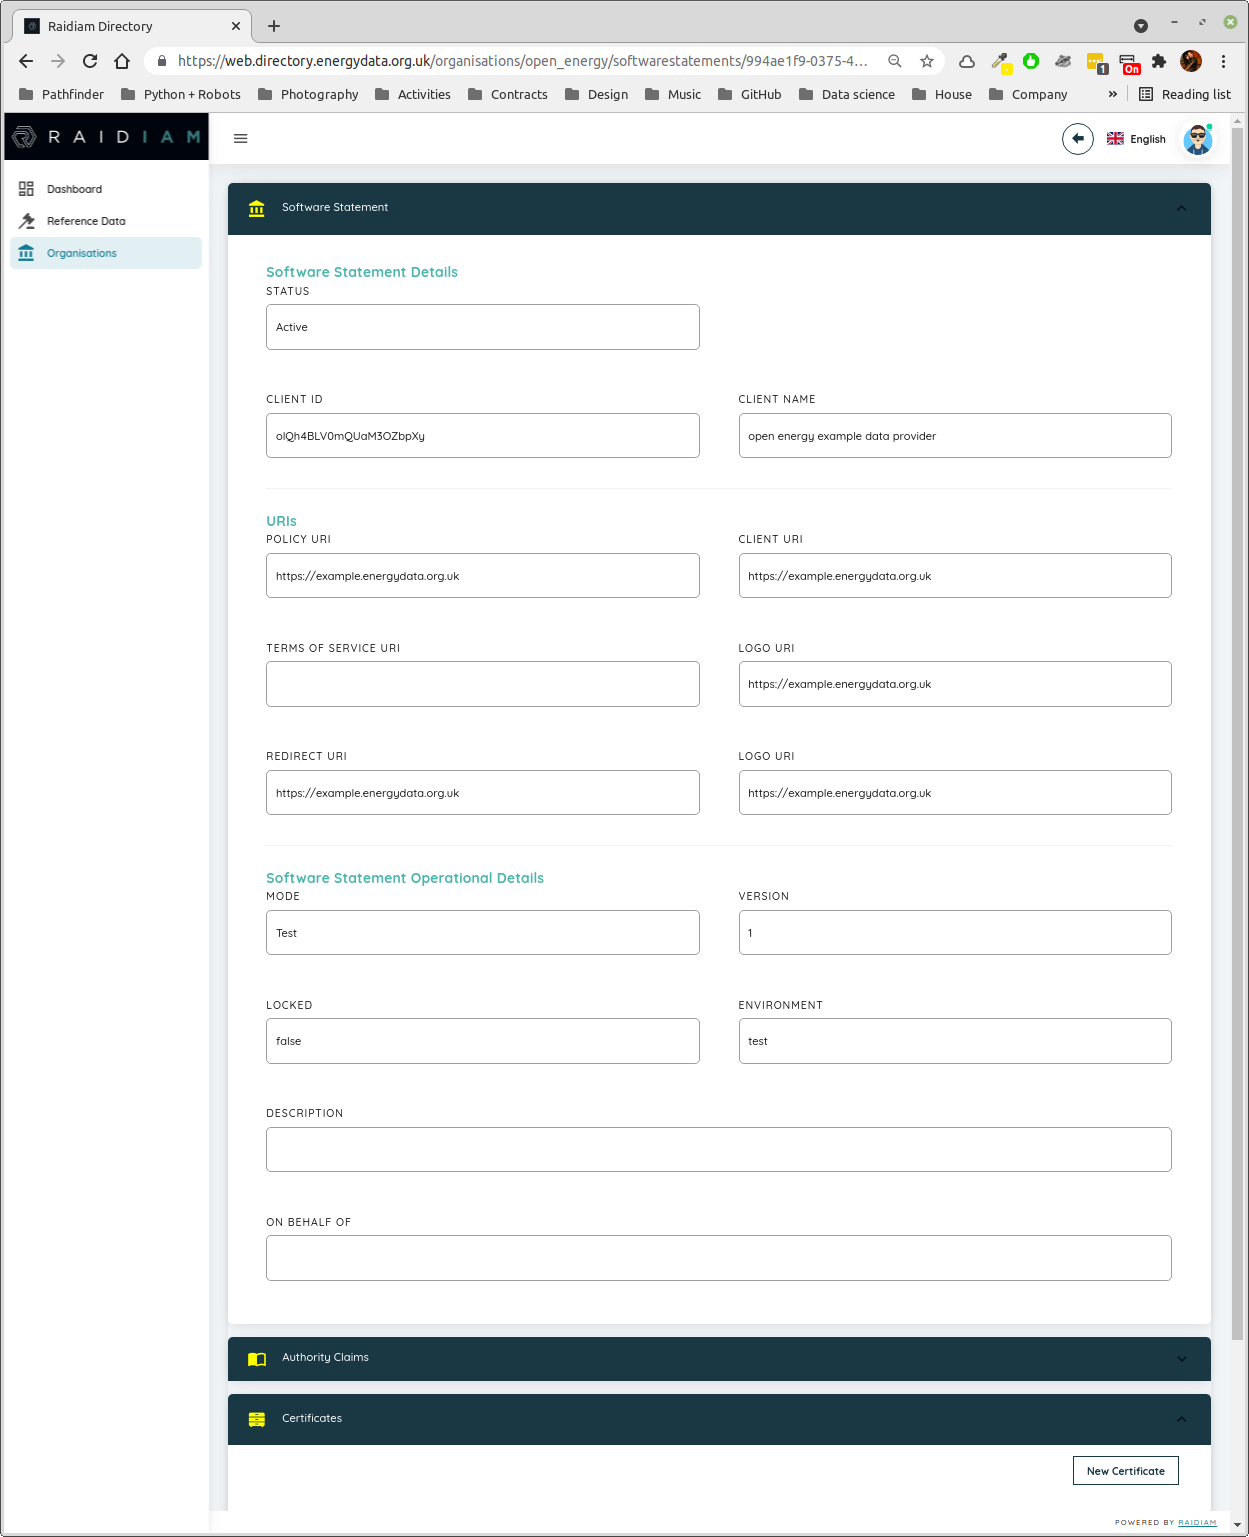
Fig. 4 Make a note of the CLIENT ID value now shown, you’ll need this later when setting up your data provider code.
Scroll down if needed until the Certificates section is visible and click on it to expand it. Click on the
New Certificate button.
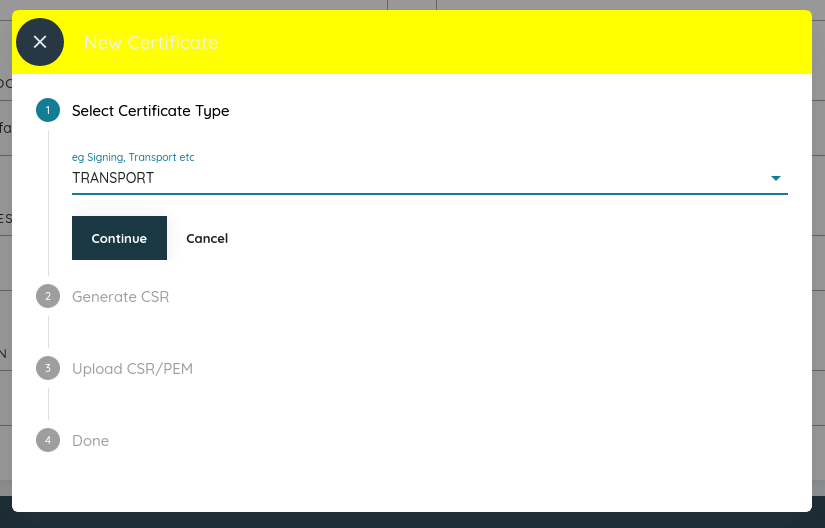
Fig. 5 Select TRANSPORT as the certificate type and click Continue
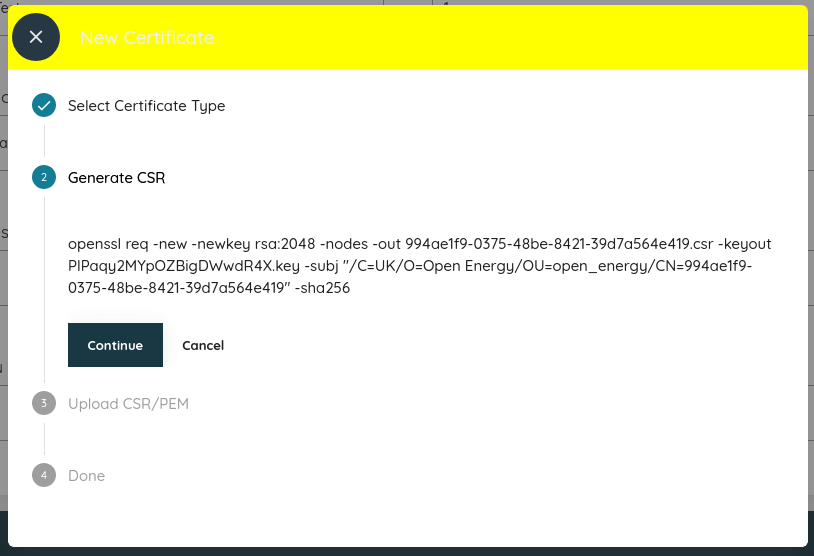
Fig. 6 The text shown here is a linux command which will generate a private key (which should never leave your server) and
a CSR, or certificate signing request, which you will need to upload in the next step. This command needs to be run
on your EC2 instance, it does not require sudo but must be run exactly as shown.
When run, it will generate a .key and .csr file with unreasonably long names. You will need to upload the
CSR file in the next step, so copy it off your EC2 instance to your local desktop using scp. Click Continue
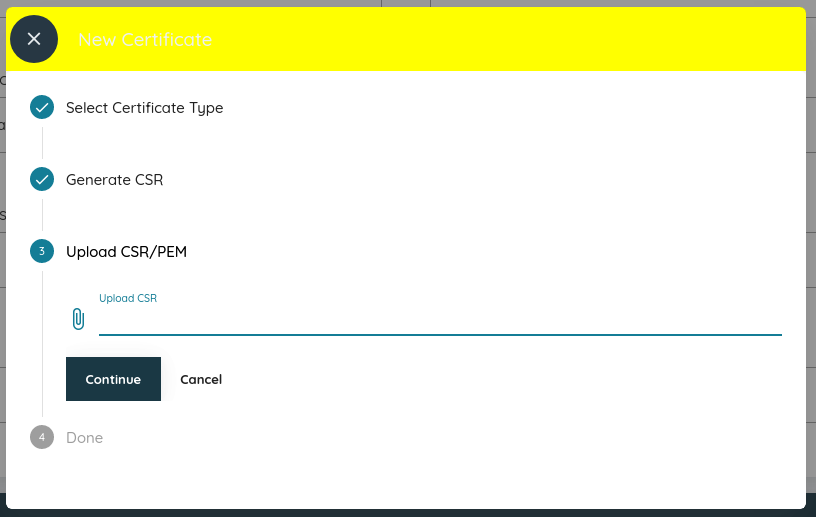
Fig. 7 Upload the .csr file you copied off the EC2 instance here and click Continue.
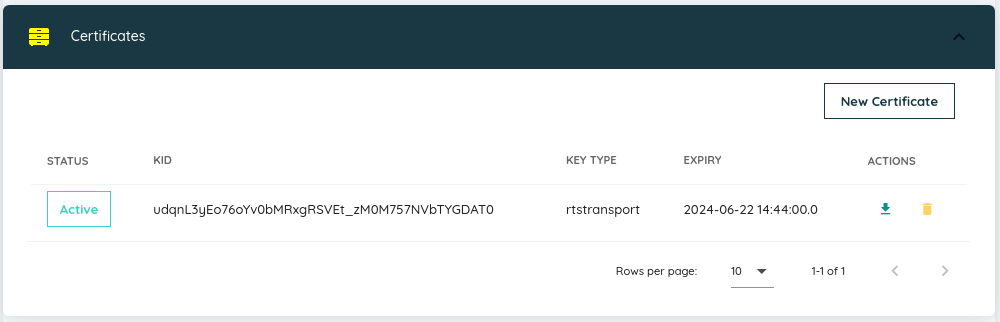
Fig. 8 You should now see your newly minted certificate. Use the small green arrow on the right to download the certificate itself, and use whatever mechanism you prefer to copy it across to your EC2 instance.
Note
If you are running linux on your local machine it might be simpler to do all the key generation locally and then copy both the private key and the certificate across to your EC2 instance - you don’t need the CSR file after this initial setup process.
Rename your key and certificate
To avoid having to continually type extremely long semi-random filenames, I prefer to rename the .key and .pem
files you should now have on your EC2 home directory. The rest of this guide assumes you have placed both these files
in a directory /home/ec2-user/certs and renamed them a.key and a.pem respectively. These filenames are
referenced from the data provider code you will create in the final section of this guide, so if you haven’t done this
you will need to make the corresponding changes there.
Installing gunicorn and your Data Provider
The data provider code uses the virtual environment defined previously. The only remaining tasks are to create the necessary configuration for gunicorn and to provide the actual data provider implementation as a Flask app.
gunicorn configuration
Create a file /home/ec2-user/gunicorn.conf.py:
import multiprocessing

bind = 'unix:/run/gunicorn.sock'
workers = multiprocessing.cpu_count() * 2 + 1
timeout = 30
The only critical line here is the bind command, which tells gunicorn that we want it to listen to the UNIX socket
we previously configured Nginx to use.
gunicorn service
To run gunicorn as a service, and to have that service automatically start up when requests are received, you need to
create two files in /etc/systemd/system:
[Unit]
Description=gunicorn daemon
Requires=gunicorn.socket
After=network.target

[Service]
Type=notify
# the specific user that our service will run as
User=ec2-user
Group=ec2-user
# another option for an even more restricted service is
# DynamicUser=yes
# see http://0pointer.net/blog/dynamic-users-with-systemd.html
RuntimeDirectory=gunicorn
WorkingDirectory=/home/ec2-user/
ExecStart=/home/ec2-user/venv/bin/gunicorn data_provider:app
ExecReload=/bin/kill -s HUP $MAINPID
KillMode=mixed
TimeoutStopSec=5
PrivateTmp=true

[Install]
WantedBy=multi-user.target
[Unit]
Description=gunicorn socket

[Socket]
ListenStream=/run/gunicorn.sock
# Our service won't need permissions for the socket, since it
# inherits the file descriptor by socket activation
# only the nginx daemon will need access to the socket
SocketUser=nginx
# Optionally restrict the socket permissions even more.
# SocketMode=600

[Install]
WantedBy=sockets.target
There’s nothing in either of these files specific to example.energydata.org.uk so create them exactly as shown
above. To enable and start the socket run the following command:
> sudo systemctl enable --now gunicorn.socket
Data Provider code
Finally, you need to provide the (very small!) piece of code which defines the data provider itself. Create a file
/home/ec2-user/data_provider.py with the following contents:
import logging

import flask

from ib1.openenergy.support import AccessTokenValidator, nginx_cert_parser

LOG = logging.getLogger('example.energydata.org.uk')

logging.basicConfig(level=logging.INFO)

validator = AccessTokenValidator(client_id='olQh4BLV0mQUaM3OZbpXy',
                                 certificate='/home/ec2-user/certs/a.pem',
                                 private_key='/home/ec2-user/certs/a.key',
                                 issuer_url='https://matls-auth.directory.energydata.org.uk/',
                                 client_cert_parser=nginx_cert_parser)
app = flask.Flask(__name__)


@app.route('/<path:data_file>')
@validator.introspects(scope='')
def homepage(data_file):
    """
    This is a very simple route that doesn't do much, but as it's decorated with the validator
    token introspection endpoint it will trigger inspection of the supplied bearer token via the
    directory introspection point, and the resultant object will be passed as
    flask.g.introspection_response.
    """
    LOG.info(f'home: token introspection response is {flask.g.introspection_response}')
    return flask.send_from_directory('/home/ec2-user/shared_data', data_file + '.csv')
This particular data provider implementation is very simple, it defines a single route which takes the name of a
data file to be located in the shared_data directory, adds .csv to the filename and returns it. In the process
of doing this, however, the validator configured in the first part of the file will kick in and ensure that the client
making the request has presented both a valid client certificate and a valid access token.
Add some data
A data provider without data is a sad thing indeed. The code expects CSV files in a directory
/home/ec2-user/shared_data along with any static content you wish to share (although see previous sections about
enabling SSL without client certificates!) in /home/ec2-user/public. Create the directories:
> cd ~
> mkdir public shared_data
Put data of your choice in the shared_data folder. In our case we have:
(venv) [ec2-user@ip-172-31-16-197 ~]$ ls shared_data/
tidy_DYTS01_CO2.csv  tidy_DYTS01_kWh.csv  tidy_DYTS02_kWh.csv
These will be available at https://example.energydata.org.uk/tidy_DYTS01_CO2 and so on, note that the code adds the
.csv part to the file name when fetching it. In practice, it’s likely your data provider will be more complex than
something which simply returns a file, but that should be a question of creating additional routes in the Flask
application, no changes are required elsewhere.
Restarting the server after changes
Any changes to the data provider code may require a restart, to be safe run:
> sudo systemctl restart gunicorn
Logging and monitoring
As both gunicorn and Nginx are managed by systemd, you can use the regular tools to view logs, check status, stop and restart services etc as needed. In particular it’s useful to have a live view on the logs from your data provider, and you can do this with
> journalctl -u gunicorn -f
This will keep watching the application logs for changes and provide a rolling view of activity. Full use of systemd and its associated monitoring capabilities is outside of the scope of this guide however!
Coffee
If you’ve made it this far you’ve earned it…